6. Administrator Guide
Administrators have full control over the MAC platform, including user management, feature configuration, cluster management, and system settings.
6.1. Admin Dashboard
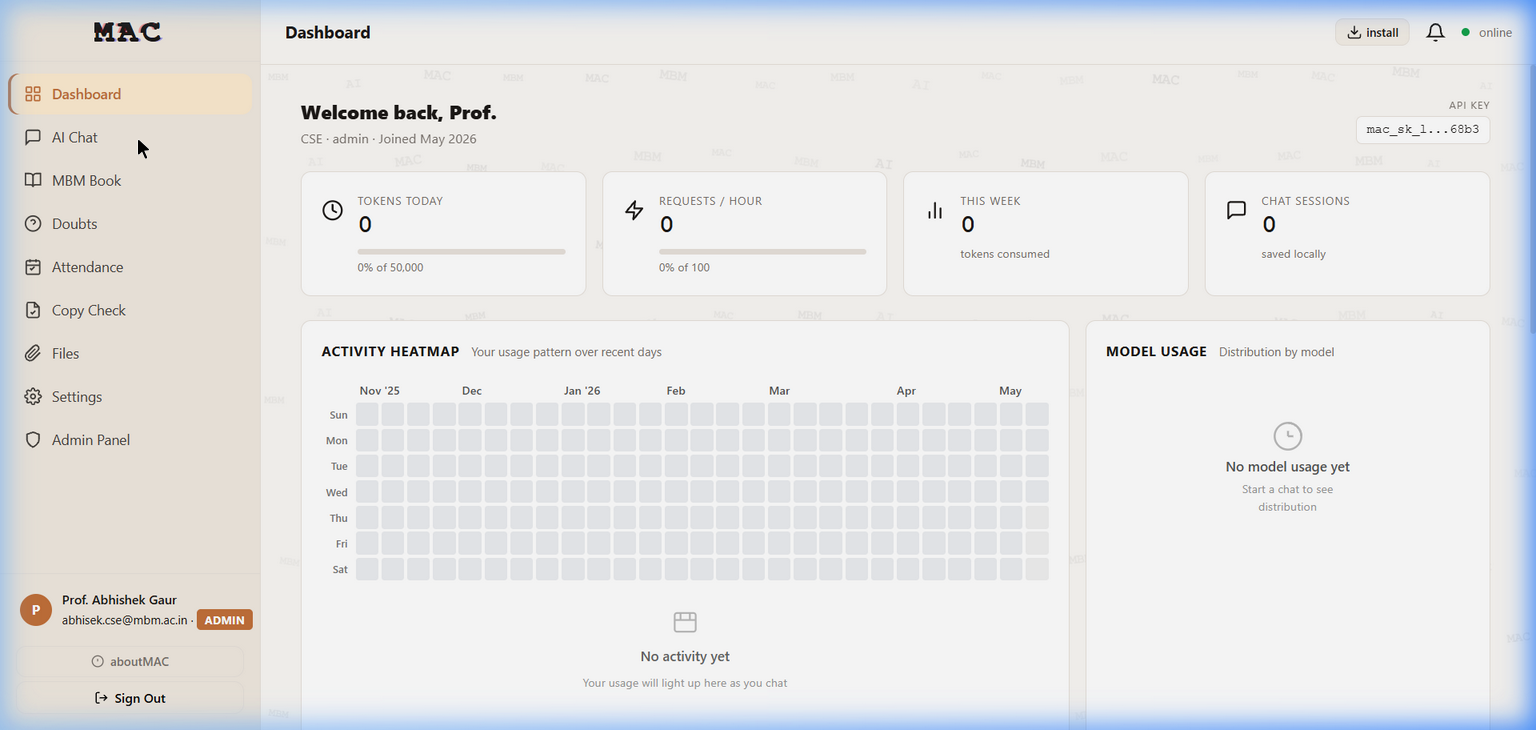
The Admin Dashboard showing usage statistics, activity heatmap, model usage distribution, and the full sidebar navigation with all admin tools.
The admin sidebar includes all features available to students and faculty, plus:
Admin Panel – Central management hub
Hardware – GPU/CPU/RAM monitoring
Cluster – Worker node management
Network – Speed tests and network info
Academic – Branch and section management
Usage – Platform-wide usage analytics
6.2. Admin Panel
The Admin Panel is the central management hub with multiple tabs:
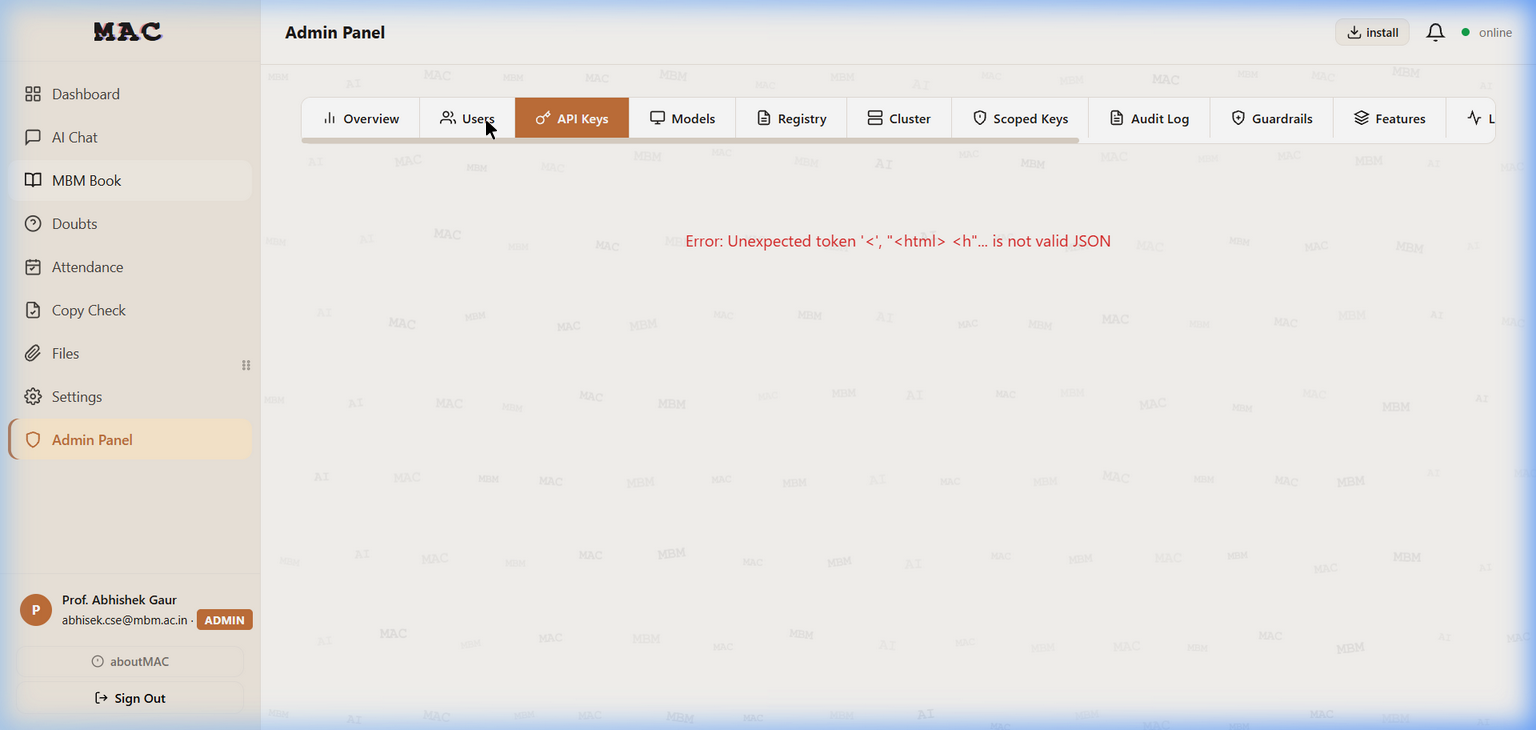
The Admin Panel showing the tab navigation: Overview, Users, API Keys, Models, Registry, Cluster, Scoped Keys, Audit Log, Guardrails, Features, and more.
6.2.1. User Management
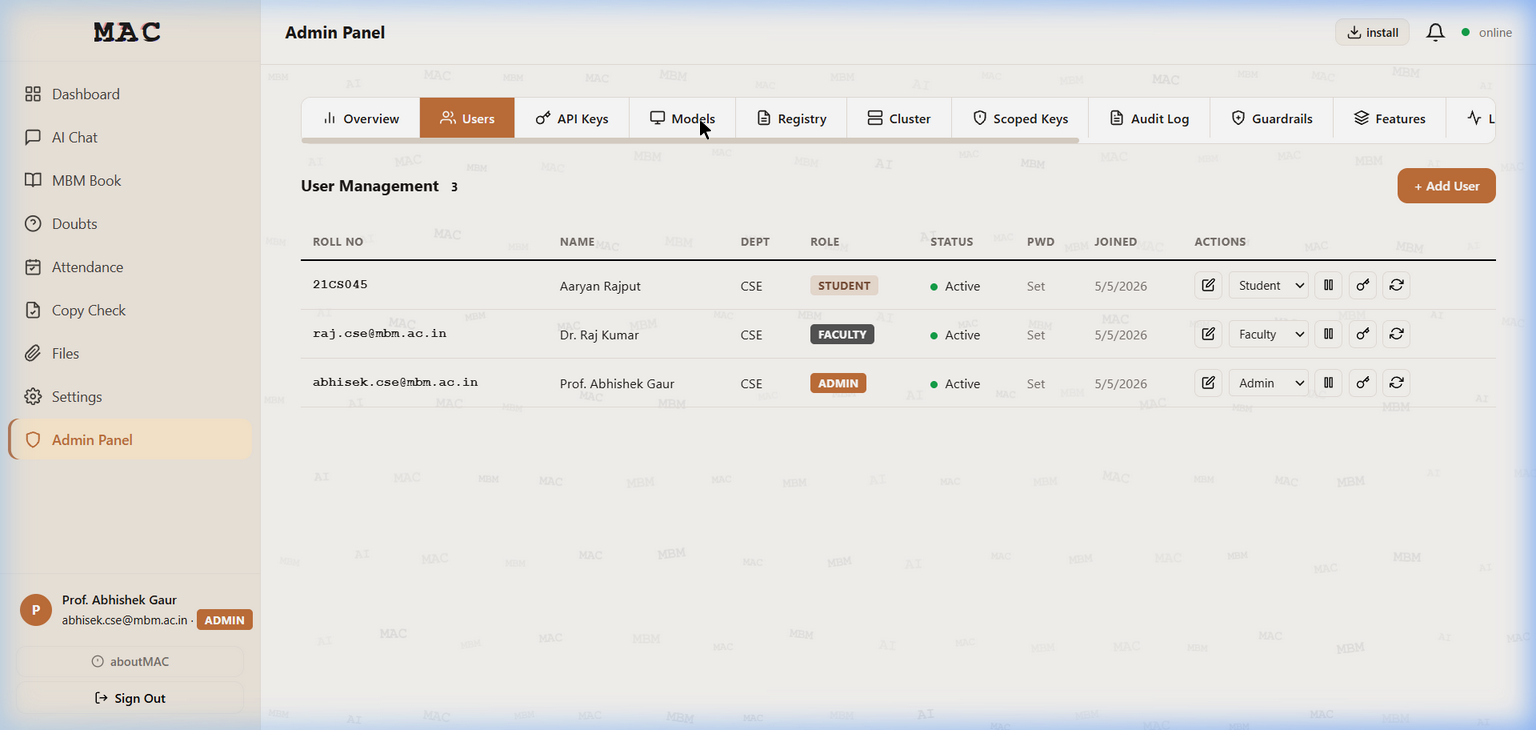
The User Management tab showing all registered users with their Roll Number, Name, Department, Role, Status, Password state, Join date, and action buttons.
Available Actions:
Action |
Description |
|---|---|
Edit |
Modify user details (name, email, department) |
Delete |
Remove a user account |
Reset Password |
Force password reset on next login |
Change Role |
Promote or demote a user (Student/Faculty/Admin dropdown) |
Toggle Status |
Activate or deactivate a user account |
Adding a New User:
Click “+ Add User” in the top-right corner
Fill in the user details form
The user will be created with
must_change_password=True
6.2.2. Registry Management
The Registry is used to pre-register students, faculty, and admins before they sign up. It contains their Registration Number, Name, Department, Date of Birth, and Role.
Adding Registry Entries:
Single entry: Click “Add” and fill in the form
Bulk import: Upload a JSON or CSV file with multiple entries
CSV format:
roll_number,name,department,dob,batch_year,role
Registry Tabs:
The Registry is organized into three sub-tabs:
Students – All student registry entries
Faculty – All faculty registry entries
Admins – All admin registry entries
6.2.3. Feature Flags
Feature flags control which features are available to which roles:
Flag Key |
Label |
Default Enabled Roles |
|---|---|---|
|
AI Chat |
Student, Faculty, Admin |
|
Web Search in Chat |
Student, Faculty, Admin |
|
MBM Book (Notebooks) |
Student, Faculty, Admin |
|
Document Upload |
Student, Faculty, Admin |
|
Doubts Forum |
Student, Faculty, Admin |
|
File Sharing |
Student, Faculty, Admin |
|
Voice Input (STT) |
Student, Faculty, Admin |
|
Text-to-Speech |
Student, Faculty, Admin |
|
Image Generation |
Student, Faculty, Admin |
|
Community Models |
Student, Faculty, Admin |
|
Dark Mode |
Student, Faculty, Admin |
|
Guest Access |
(disabled) |
|
Video Studio |
Admin only |
6.2.4. Quota Management
Admins can set per-user quotas for API usage:
Requests per hour – Default: 100
Tokens per day – Default: 50,000
Storage quota – Per-user file storage limit (in MB)
Quotas can be overridden for individual users from the Quota tab.
6.2.5. Guardrails
Content safety rules that are checked before sending prompts to the LLM. Admins can add, edit, or remove guardrail rules that filter inappropriate content.
6.2.6. Audit Log
The Audit Log records all administrative actions:
User creation, modification, and deletion
Role changes
Feature flag modifications
System configuration changes
6.3. Cluster Management
MAC supports a multi-PC GPU cluster where additional machines contribute processing power:
Cluster Architecture:
PC1 (Host)    -- start-mac.bat       -- All services + Qwen2.5-7B chat
PC2 (Worker)  -- start-mac-worker.bat -- Mistral-7B creative chat
PC3 (Worker)  -- start-mac-worker.bat -- Qwen2-VL-7B vision model
Adding a Worker Node:
Install MAC on the worker machine
Run
start-mac-worker.batThe worker auto-registers with the host
Monitor connected workers from the Cluster tab in the Admin Panel
Worker nodes provide:
Additional GPU inference capacity
Load-balanced request distribution
Heartbeat monitoring for reliability
6.4. Hardware Monitoring
The Hardware page shows real-time system metrics:
GPU utilisation – Memory usage, temperature, compute load
CPU utilisation – Per-core usage
RAM usage – Total, used, and available memory
Disk usage – Storage capacity and utilisation
6.5. Network Tools
The Network page provides:
Speed test – Measure network throughput
Network info – Display LAN IP addresses and interface details
QR Wi-Fi join – Generate QR codes for easy Wi-Fi connection
6.6. Academic Structure
Manage the institution’s academic structure:
Branches – Create and manage academic branches (e.g., CSE, ECE, ME)
Sections – Define sections within each branch
Year assignment – Assign students to year groups
6.7. System Configuration
The System tab provides key-value configuration for platform-wide settings.
These are stored in the system_config database table and can be modified
at runtime without restarting the application.
6.8. First-Boot Setup
When deploying MAC for the first time:
Navigate to
http://<server-ip>/The setup wizard appears automatically (if no users exist)
Create the founder admin account:
Enter name, email, and password
This account gets
is_founder=Truefor recovery purposes
Log in with the founder account
Navigate to Admin Panel > Registry
Bulk-import the student and faculty registry
Students and faculty can now verify and create their accounts